Do you want to grow lots of worms at home? The Super Simple Worm Farm Bin is the answer. My advice is K.I.S.S. (Keep It Super Simple). It’s a lot easier to get started than many people think!
The basic plastic bin set-up described here is especially well suited for European Nightcrawlers – since they love moist condition – but it’s a great starter bin for Red Worms as well.
Here is all you need to build your Super Simple Worm Farm Bin:
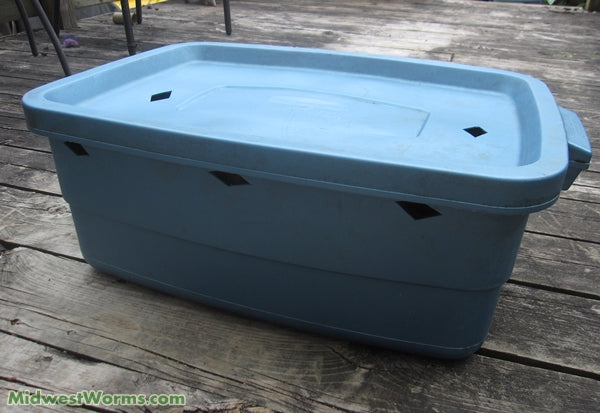
- A Plastic Bin – my personal favorite is a Rubbermaid “Roughneck” tote, approx 21″x15″ and a depth of 9″. I wouldn’t recommend going much deeper than 18″ with a bin like this since it will impede air flow to the lower reaches of the bin.
- Bedding – these are absorbent materials like shredded cardboard, shredded newsprint etc. They help to soak up and hold moisture and to provide the worms with a nice habitat to live in. Contrary to popular (newbie) belief – soil is NOT a good bedding material for a worm bin. Here is a great article on Worm Bin Bedding.
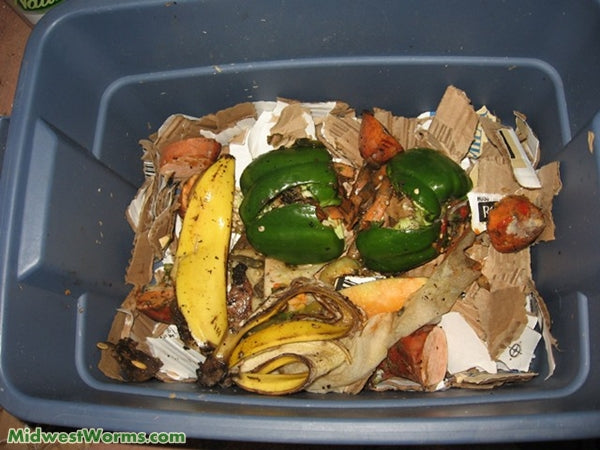
- Compostable Kitchen Scraps – fruit and veggie wastes are ideal. When starting out you are probably best to steer clear of citrus wastes, spicy/salty materials, and even starchy wastes.
- Composting Worms (not needed right away) – again, Euros and/or Red Worms are very well suited for this type of system. For a beginner Red Worms (Red Wigglers) are the easiest and most tolerant.
Setup
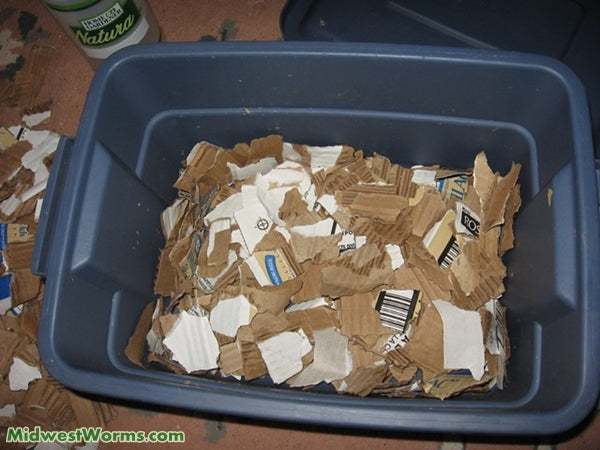
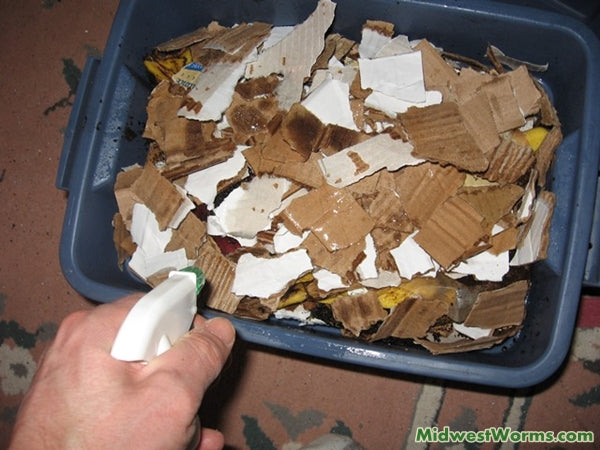
Setting up the bin is as easy as pie – really, it’s just a matter of starting and ending with thick bedding layers and putting some food waste in between. I recommend freezing/thawing the food materials and then chopping up before adding to the bin, if possible (i.e. MORE optimized than shown in images below, in case you are wondering), since this speeds up the breakdown process.
If the bedding is not already moistened, you can spray it down as you go. This is especially important if you plan to add the worms fairly soon afterward – but, if possible, I actually recommend leaving the bin to sit for a little while before the worms are added.
The Value of Moisture
The key with moisture is to get the habitat as moist as you can without excess pooling of liquid in the bottom. If you DO end up with pooling, simply add in some dry bedding to soak it up.
The bin itself should have some air holes in it. I used to drill lots of smaller holes in my bins, but have since switched over to cutting out fewer (but considerably larger) holes – as you can see in the image at the beginning of this article.
Ideally, your bin should sit someplace indoors. It is possible to keep plastic bin systems outside at certain times of the year, in certain locations – but once the weather gets really warm or cold, things can get a lot more challenging (impossible in many cases). We’ll talk more about effective outdoor systems in upcoming articles.
Adding worms to the super simple worm farm bin (a pound, or 1 gal. of our “Composting Worm Mix” for a bin of the size mentioned earlier) is easy too. Simply create a small depression in your bedding, empty out the worm bag(s), and leave in a well-lit location for several hours. If at all possible, I would actually recommend leaving the bin in a location that has some light all the time – at least until the worms are well settled in. Euros, in particular, can be prone to wander early on.
Things to Remember
- Use LOTS of bedding – again, shredded corrugated cardboard and/or shredded newsprint are prime examples of readily-available, highly-effective bedding materials (bleached office paper should be avoided if possible – or at least soaked and rinsed well before use). It’s always amazing to me how many people don’t add enough bedding when starting a new worm bin. Do not be afraid to fill the entire bin – the level will settle down quite quickly
- Start the bin a week or two before you add the worms – this provides time for the microbial community to develop (and waste materials to start breaking down as a result), helps moisture to become evenly distributed throughout system, and just generally leaves you with a habitat that will seem more like “home” for the worms. Many make the mistake of adding worms to a bin that’s basically sterile since set up right before the worms are added.
- DON’T add soil to a worm bin – people naturally associate worms with soil, but it’s important to remember that these are NOT soil worms. While a small amount of good quality organic soil certainly won’t hurt (and may even help to inoculate the bin with beneficial microbes), a lot of bagged potting soil can actually be very hazardous for the worms since it often contains fertilizer salts.
- Go easy on the feeding early on – people often get it in their heads that they need to “feed” their worms on a regular basis. It is important to remember, though, that the food and bedding added when the bin was set up can actually sustain the worms for quite some time. What is FAR more common than people starving their worms (next to impossible when loads of bedding materials are used) is overfeeding, which can create a lot of problems – and potentially even lead to the death of your worms!